but you have to start to be great.”
Follow along and learn how to code using Scratch and create useful and fun kids programs and games.
Scratch online courses will be linked at the bottom of this page so Do bookmark this page for quick reference.
Without further ado, let’s dive in, dissect and figure out what Scratch programming is all about and learn how to create something useful and fun from it.
What is Scratch Programming?
Scratch is a Free programming project created by the Lifelong Kindergarten Group at the MIT Media Lab which helps young people learn to think creatively to produce their own games, interactive stories and interact with other like minded people in the online community.
Since Scratch is primarily designed for 8 to 16 years old, it is relatively easy for both kids and adults to pick up and learn. 🙂
System Requirements for Scratch
Under Scratch FAQ page, the following 3 criteria are required :
- Mac, Linux or Windows computer
- Adobe Flash Player on or after June 15, 2016
- Any of the relatively recent web browser
- Chrome (Mac, Linux or Windows)
- Firefox (Mac or Windows Only)
- Safari (Mac or Windows Only)
- Edge (Windows Only)
- Internet Explorer 10+ (Windows Only)
An offline editor Scratch 2 is available for download to create Scratch projects without an internet connection (This option is used to create all the Scratch projects in these series).
You can try downloading and installing an older version Scratch 1.4 if your computer does not meet the above requirements.
Creating Scratch animation using Scratch 2 editor
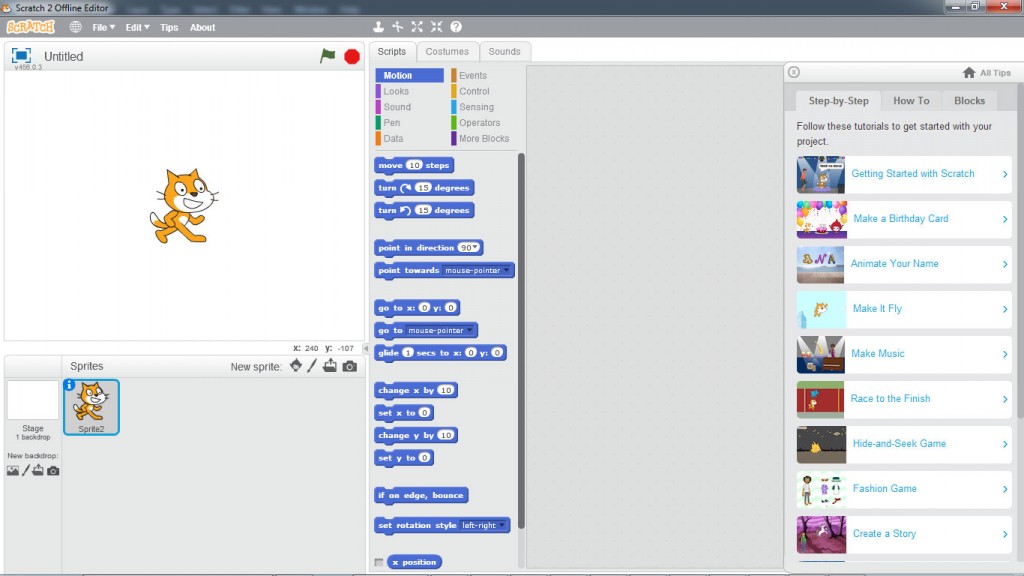
After installing Scratch 2 and upon running the program, the above screen is displayed.
At first glance, it seems pretty complicated, however Scratch is using a simple methodology of dragging and dropping predefined building blocks as compared to traditional coding language, which typically consist of hundreds or even thousands of lines of code just to create some simple animation.
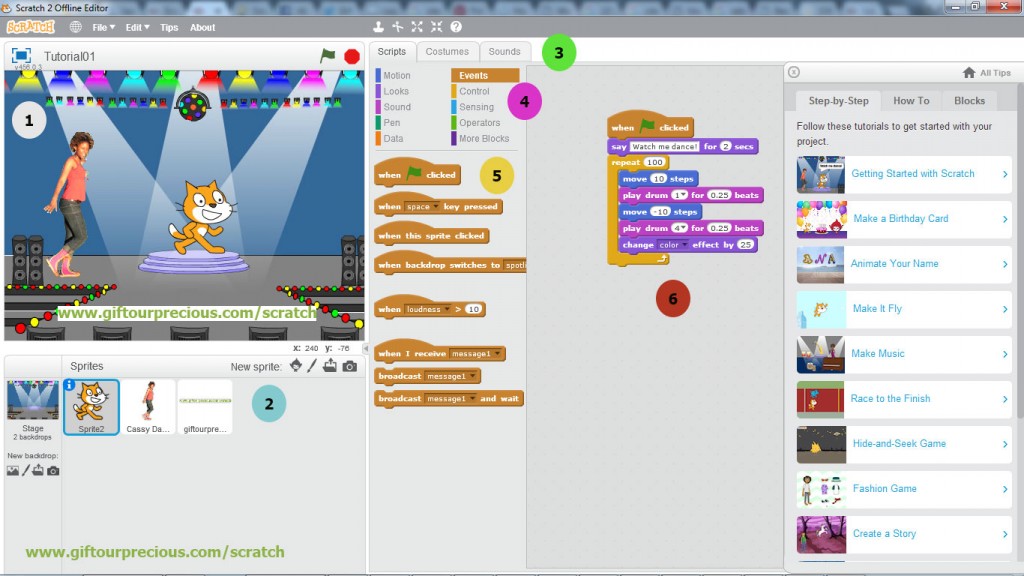
The Scratch 2 screen can be categorized broadly into 6 segments:
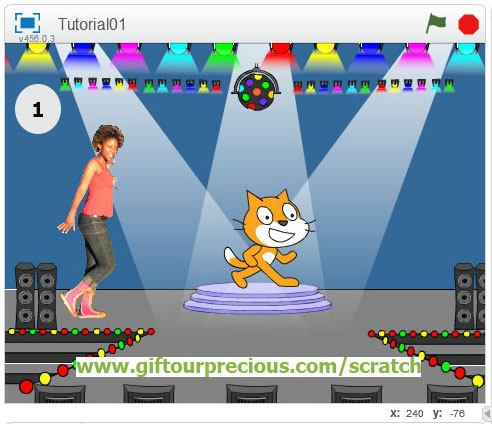
Segment 1) The project display. This is where the background image and all added characters (also known as Sprites) are arranged, preview and test run.
Segment 2) This area contains all the background images and characters. Each of the images can contain their own set of instructions and behavior as defined in programmed blocks on segment 6.
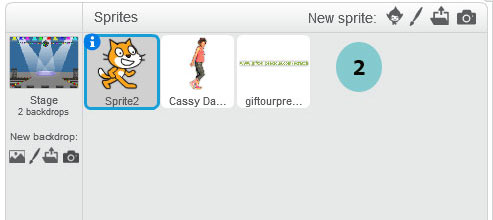
Segment 3) This segment consists of 3 tabs, namely Scripts (refer to segment 4), Backdrops or Costumes (depending if background image or sprite is selected in segment 2) and Sounds used by the selected sprite.

Segment 4) These are the 10 building blocks of Scratch categorized into the following 9 predefined blocks with an additional customized building block.
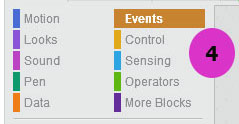
- Motion
- Looks
- Sound
- Pen
- Data
- Events
- Control
- Sensing
- Operators
- More Blocks
Segment 5) These are all the available features of the above 10 building blocks. e.g. move 10 steps, play sound, change color etc.
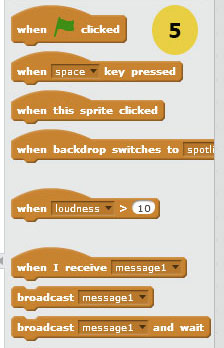
Segment 6) This is the “programming” area where different features from segment 5 are dragged and dropped and stacked against one another to create a series of animation, sound effects for the selected sprite.
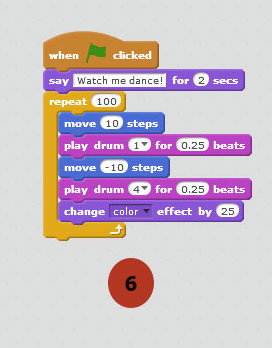
The above code is for the Cat Sprite. The behavior as follows :
When the GREEN flag is clicked,
The Cat Sprite will say “Watch me dance!” for 2 secs,
It will repeat the following 100 times,
Move 10 steps to the right,
Play drum 1 for 0.25 beats,
Move 10 steps to the left,
Play drum 4 for 0.25 beats,
Change the Cat Sprite color effect by 25
Scratch contains 13 tutorials on the right side.
By following the tutorial steps of “Getting Started with Scratch” plus some slight changes, the first Scratch animation is completed and can be accessed below (Adobe Flash Player required).
Note: Do allow some time for the animation to load.
Click on the GREEN flag and see the Cat and Woman dancing away and colors changed according to the programmed blocks.
Click on the RED button beside the GREEN flag to stop the animation.
